
Insulating a container is not really about warmth. It is about keeping the inside face of the steel above the temperature at which the air gives up its moisture. Do that continuously and you solve condensation, comfort and running costs in a single move. Do it with gaps and you have simply hidden the problem inside a wall you can no longer inspect.
On this page
What insulation is actually for
People come to insulation for three different reasons and it pays to know which one is yours, because the right specification differs.
Condensation control
The most common reason, and the one that applies even to unheated stores. Warm the steel surface and container rain stops happening at all.
Thermal comfort
If people work or sit in the unit, insulation is what makes it possible. An uninsulated steel box is unusable in strong sun and miserable in frost.
Running costs
Any heating or cooling you install into an uninsulated container is money leaving through the walls. Insulate first, then size the plant.
If your only concern is condensation in a general store, you may not need insulation at all — well-placed ventilation and goods lifted off the floor solve a great deal, as covered in our ventilation guide. Insulation becomes essential the moment the unit is occupied, heated, cooled, or holding anything that objects to a damp night.
The dew point rule
Everything about container insulation follows from one idea. Air carries moisture, and the colder it gets the less it can carry. The dew point is the temperature at which the air it is touching has to release that moisture. In an uninsulated container the coldest surface is the steel, so the steel is where the water appears.
Insulation works by putting a layer of poor conductor between the room air and the cold steel, so the surface the air actually touches stays warm. The word that carries all the weight is continuous. A break in the insulation is a cold bridge, and a cold bridge is a strip of surface still sitting below dew point, quietly collecting water. Corner posts, door frames, cross members and every batten screwed straight to steel are all potential cold bridges.
The mistake to avoid: fitting rigid board on timber battens with no air sealing. The steel behind the void is still cold, warm moist air still reaches it through gaps, and the condensation now forms where you cannot see it. Rotten battens two years later are the usual outcome.
Systems compared
| System | Strengths | Trade-offs |
|---|---|---|
| Closed-cell spray foam | Insulates and air-seals in one pass, follows corrugations, no separate vapour barrier, excellent thermal performance per millimetre | Specialist application, harder to modify later, poor jobs are difficult to remedy |
| Rigid PIR or PUR board | Good performance, clean and predictable, easy to line over, DIY friendly | Needs meticulous air sealing and taping, batten cold bridges must be broken |
| Insulated composite panels | Fast, tidy, factory finish on both faces, easy to clean | Highest space loss, fixings need care, less forgiving around openings |
| Mineral wool between studs | Cheap, non-combustible, good acoustically | Requires a properly detailed vapour barrier; loses performance badly if it gets damp |
| Reflective multifoil | Very thin, useful in tight spaces and over the roof | Needs air gaps on both sides to work at all; rarely sufficient on its own |
| Cork or sprayed thermal coating | Applied externally, keeps all internal space, reduces solar gain | Modest thermal value; a solar and condensation measure rather than a full solution |
What it costs you in space
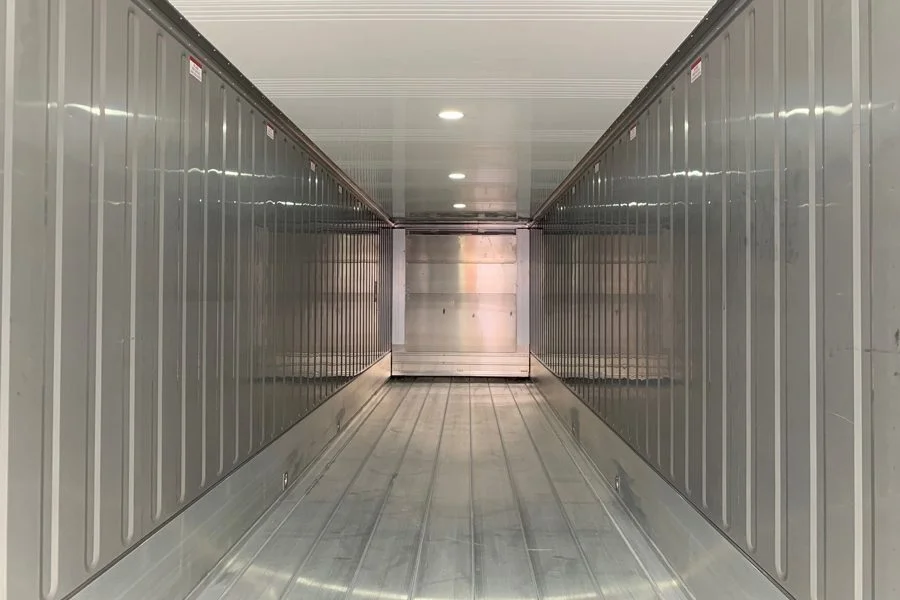
A 20ft container is a little under 8 ft wide internally before you do anything. Insulate and line both sides with a board system and you can lose the best part of a foot of that width, plus similar off the height. It is the single most common regret in container conversions and it is entirely avoidable by planning for it.
Two conclusions follow. First, if you are insulating, buy a high cube. The extra foot of headroom is exactly what the ceiling build-up takes away, and our high cube guide explains the transport implications. Second, check the finished internal dimensions against what you actually need to fit before you commit — the figures in our size guide are the starting point, not the finished room.
The details that decide the outcome
- Insulate the ceiling first. The roof is the coldest surface at night and the hottest in the afternoon. If you do one surface, do that one.
- Break every thermal bridge. Where a batten or frame must touch steel, put an insulating pad or a foam strip between them.
- Do not forget the floor. A cold deck is a cold surface. Insulating above the plywood, then finishing with vinyl or laminate, transforms comfort. See our flooring guide.
- Detail the openings. Door frames, window reveals and vent penetrations are where insulation systems fail. Return the insulation into the reveal rather than stopping short.
- Keep ventilation in the plan. Sealing the box is the point of the exercise, so the air has to be changed deliberately instead of accidentally.
- Think about fire and finish. Check the fire performance of foam and lining materials for any occupied unit, and specify accordingly.
Insulating an occupied unit
Once people spend time in a container the specification changes in kind, not just in degree. You are no longer managing condensation, you are building a small habitable envelope, and that brings thermal performance targets, ventilation rates, lighting, electrical certification and means of escape into the conversation. Many jurisdictions treat this as a building rather than a piece of equipment, which is covered in our permits and zoning guide.
Practically, an occupied unit wants continuous insulation on all six surfaces, mechanical ventilation with heat recovery or at least a humidistat extract, a small heat pump sized after insulation is decided, and a lining that can take fixings. Get the envelope right and a container office is genuinely comfortable. Get it wrong and no amount of heating will make it pleasant.
Choose a high cube
Headroom is the resource you cannot buy back later.
Fix the shell first
Any rust treatment, roof repair or panel work happens before insulation goes anywhere near it.
Insulate continuously
All six surfaces, with every bridge broken and every penetration detailed.
Air seal, then ventilate
Seal deliberately, then introduce controlled air changes rather than leaks.
Line and finish
Plywood for workshops, plasterboard or melamine for offices, vinyl or laminate underfoot.
Size the heating last
Plant sized against an insulated envelope is smaller, cheaper and quieter.
Budgeting and sequencing
Insulation is rarely the largest line in a conversion, but it is the one that determines whether every other pound was well spent. Heating, lining, flooring and electrics all sit downstream of it, and all of them are harder and more expensive to revisit than to specify correctly at the start.
Two pieces of sequencing advice save the most money. First, do all steelwork — openings, vents, rust treatment, painting — before insulating, because every one of those jobs becomes far more disruptive once the envelope is closed. Second, have it done in the yard rather than on your site if you can. Workshop conditions, lifting equipment and dry weather produce a better result faster, and it is covered in our modifications guide.
Insulated and lined before it arrives
We can supply units sprayed, insulated, lined and wired to your specification, so the container that turns up is the finished space rather than the start of a project.
Insulation questions answered
For most conversions, closed-cell spray foam applied directly to the inside of the steel. It insulates and air-seals in one operation, follows the corrugations so it loses almost no internal space, and eliminates the cold surface that causes condensation. Rigid board and insulated panels are good alternatives where a sprayed finish is not practical.
Spray foam at 50 mm plus a thin lining typically costs you around 70 to 80 mm per wall. Rigid board on battens with plywood over it is more like 100 to 125 mm. On a 20ft container that is the difference between a comfortable space and a corridor, which is why high cube units are strongly preferred for insulated builds.
Board and batten systems are well within the reach of a competent DIY builder. Spray foam is a specialist application requiring the right equipment, ventilation and protective gear, and a poor spray job is very difficult to correct. Most people do the framing and lining themselves and bring a contractor in for the foam.
With closed-cell spray foam the foam is the vapour control layer, so no separate membrane is needed. With mineral wool or rigid board you absolutely need proper vapour control on the warm side, otherwise moisture passes through the insulation and condenses on the steel behind it where you will never see it.
Continuous, well-sealed insulation will, because it keeps the internal surface above dew point. Insulation with gaps, thermal bridges or an unsealed cavity will not; it simply relocates the condensation into the void. Insulation plus ventilation is the reliable combination.
It is the single most effective partial measure, because the roof is the coldest surface at night and the hottest in the afternoon sun, and it is where container rain forms. If budget only allows one surface, insulate the ceiling.